Summary
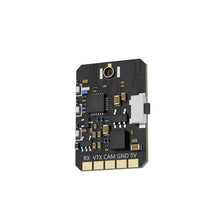
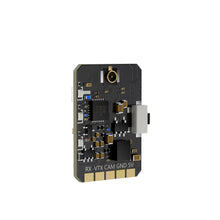
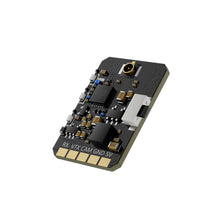
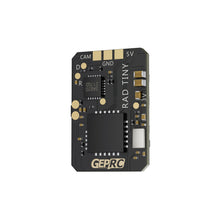
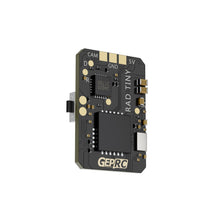
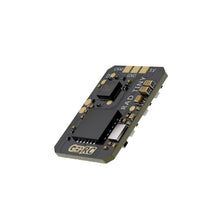
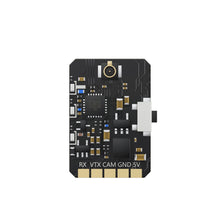
GEPRC RAD Tiny 5.8G 400mW VTX is compact and lightweight and can fit into tight spaces. It weighs only 1.1g (excluding antenna). It has 3 adjustable power levels, the maximum power is 400mW, and the signal is stable. With temperature control protection to prevent overheating and burning. IRC Tramp protocol, OSD quick parameter adjustment, one parameter adjustment button, three indicator lights, easy and fast operation.
Specifications
- Model: GEPRC RAD Tiny 5.8G 400mW VTX
- Input Voltage: DC 5V
- Output Voltage: 5V(Power supply 5V to camera)
- Input Impedance: 75Ω
- Control protocol: IRC Tramp
- Antenna: UFL
- Output power: 25mW/200mW/400mW/PIT MODE
- Channels: 48CH
- Video Format: PAL/NTSC
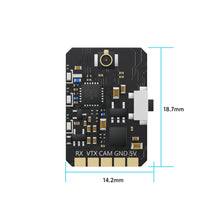
- Dimension: 14mmx18.5mm
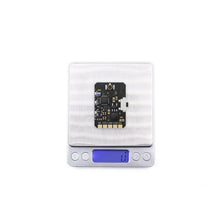
- Weight: 1.1g(antenna not included)
Features
- Compact size, more installation possibilities.
- The 400mW power generates little heat and the signal is stable, suitable for medium and short distance flights.
- With temperature control protection function to prevent high temperature burning
- .DC 5V input, convenient for drawing power from the flight controller.
Includes
1 x GEPRC RAD Tiny 5.8G 400mW VTX
1 x black 1.13 copper tube antenna
1 x SH1.0-5P plug silicone cable
1 x SH1.0-3P plug silicone cable
1 x GEPRC RAD Tiny 5.8G 400mW VTX Manual
Function Button and indicators instruction
- Press and hold for 2S to start from the frequency point. Cycle through frequency points (green indicator light), channel groups (blue indicator light), and power (red indicator light).
- After the corresponding function is selected (the corresponding indicator light is on), press it immediately to cycle through the functions.
- Press and hold the side button for 2 seconds, the blue light will flash, and enter the frequency adjustment mode. Short press to switch the frequency points CH1 to CH8, select a frequency band and the indicator light will flash corresponding times.
- After switching the frequency point, press and hold the button for 2 seconds again within five seconds. The green light flashes to enter the channel adjustment mode. Short press to switch channels. Band A (flashes 1 time); Band B (flashes 2 times); Band E (flashes 3 times); Band F (flashes 4 times); Band R (flashes 5 times); Band L (flashes 6 times).
- After switching the channel, press and hold the button for 2 seconds again within five seconds. The red light flashes to enter the power adjustment mode. Short press to switch power: 25mW (flashes 1 time); 200mW (flashes 2 times); 400mW (flashes 3 times). ); PIT Mode
Notice
- When installing the image transmission, space must be left to ensure air convection around the module and ensure heat dissipation of the module. Otherwise, the module overheating protection will activate, reduce power transmission, or even turn off power transmission.
- It is recommended to ensure the correct voltage range before turning on the power. The positive and negative poles are correct to avoid burning out the components.
- It is recommended to make sure that an antenna has been installed at the RF output end before turning on the power, which can extend the service life of the module.
- Please read the instruction manual before use so that you can wire it correctly and extend the service life of the module.
คำอธิบายสินค้า (Description)
สรุป (Summary)
GEPRC RAD Tiny 5.8G 400mW VTX เป็นโมดูลส่งสัญญาณวิดีโอขนาดเล็ก น้ำหนักเบา เหมาะสำหรับติดตั้งในพื้นที่จำกัด น้ำหนักเพียง 1.1 กรัม (ไม่รวมเสาอากาศ) มีระดับกำลังส่งให้เลือก 3 ระดับ สูงสุดที่ 400mW ให้สัญญาณที่คงที่ พร้อมระบบควบคุมอุณหภูมิป้องกันความร้อนสูงเกินไปและการไหม้ รองรับโปรโตคอล IRC Tramp และการปรับค่าผ่าน OSD รวมถึงปุ่มปรับค่าหนึ่งปุ่มและไฟแสดงสถานะ 3 ดวง ใช้งานง่ายและสะดวกมาก
สเปก (Specifications)
-
รุ่น: GEPRC RAD Tiny 5.8G 400mW VTX
-
แรงดันไฟฟ้าขาเข้า: DC 5V
-
แรงดันไฟฟ้าขาออก: 5V (จ่ายไฟให้กล้อง)
-
อิมพีแดนซ์อินพุต: 75Ω
-
โปรโตคอลควบคุม: IRC Tramp
-
ขั้วต่อเสาอากาศ: UFL
-
กำลังส่ง: 25mW / 200mW / 400mW / PIT Mode
-
ช่องสัญญาณ: 48 ช่อง
-
รูปแบบวิดีโอ: PAL / NTSC
-
ขนาด: 14 × 18.5 มม.
-
น้ำหนัก: 1.1 กรัม (ไม่รวมเสาอากาศ)
คุณสมบัติเด่น (Features)
-
ขนาดกะทัดรัด ติดตั้งได้ในหลายตำแหน่ง
-
กำลังส่ง 400mW ให้ความร้อนต่ำและสัญญาณคงที่ เหมาะสำหรับการบินระยะสั้นถึงปานกลาง
-
มีระบบควบคุมอุณหภูมิเพื่อป้องกันความร้อนสูงเกินไป
-
ใช้ไฟ DC 5V สามารถจ่ายไฟจาก Flight Controller ได้โดยตรง
อุปกรณ์ในกล่อง (Includes)
-
1 × GEPRC RAD Tiny 5.8G 400mW VTX
-
1 × เสาอากาศทองแดงแบบท่อดำ 1.13
-
1 × สายซิลิโคนหัวต่อ SH1.0-5P
-
1 × สายซิลิโคนหัวต่อ SH1.0-3P
-
1 × คู่มือการใช้งาน GEPRC RAD Tiny 5.8G 400mW VTX
คำแนะนำการใช้งานปุ่มและไฟแสดงสถานะ (Function Button & Indicator Instructions)
-
กดค้าง 2 วินาทีเพื่อเริ่มการตั้งค่าจากจุดความถี่
-
หมุนสลับระหว่าง ความถี่ (ไฟเขียว) / กลุ่มช่องสัญญาณ (ไฟน้ำเงิน) / กำลังส่ง (ไฟแดง)
-
เมื่อเลือกฟังก์ชันที่ต้องการ (ไฟของฟังก์ชันนั้นติดค้าง) ให้กดสั้น ๆ เพื่อเปลี่ยนค่าในหมวดนั้น
-
-
กดปุ่มด้านข้างค้าง 2 วินาที ไฟน้ำเงินจะกระพริบ เข้าสู่โหมดปรับความถี่
-
กดสั้น ๆ เพื่อเปลี่ยนความถี่ CH1–CH8
-
เมื่อเลือกย่านความถี่แล้ว ไฟจะแสดงจำนวนครั้งตาม Band ที่เลือก
-
Band A (กระพริบ 1 ครั้ง)
-
Band B (2 ครั้ง)
-
Band E (3 ครั้ง)
-
Band F (4 ครั้ง)
-
Band R (5 ครั้ง)
-
Band L (6 ครั้ง)
-
-
-
หลังเปลี่ยนช่องแล้ว ให้กดค้างอีก 2 วินาทีภายใน 5 วินาที ไฟเขียวจะกระพริบ เข้าสู่โหมดปรับช่องสัญญาณ
-
จากนั้นกดค้างอีกครั้ง 2 วินาทีเพื่อเข้าสู่โหมดปรับกำลังส่ง (ไฟแดงกระพริบ)
-
25mW (กระพริบ 1 ครั้ง)
-
200mW (2 ครั้ง)
-
400mW (3 ครั้ง)
-
PIT Mode
-
หมายเหตุ (Notice)
-
เวลาติดตั้ง VTX ควรเว้นช่องว่างรอบโมดูลเพื่อให้ระบายอากาศได้ดี มิฉะนั้นระบบป้องกันความร้อนอาจทำงานและลดกำลังส่งหรือปิดการทำงานชั่วคราว
-
ตรวจสอบแรงดันไฟให้ถูกต้องก่อนเปิดเครื่อง และเชื่อมต่อขั้วบวก-ลบให้ถูกต้องเพื่อป้องกันการไหม้ของวงจร
-
ควรติดตั้งเสาอากาศที่ช่อง RF ก่อนเปิดเครื่อง เพื่อยืดอายุการใช้งานของโมดูล
-
โปรดอ่านคู่มือก่อนใช้งานเพื่อเชื่อมต่อสายไฟได้อย่างถูกต้องและช่วยยืดอายุการใช้งานของอุปกรณ์


